THE STICKERROAR GUIDE
PNG or JPG for Stickers? Choose Your Upload File
Choose PNG for transparent artwork or sharp graphics, and JPG for photos with a background. Check your file and preview before requesting custom stickers.
Updated
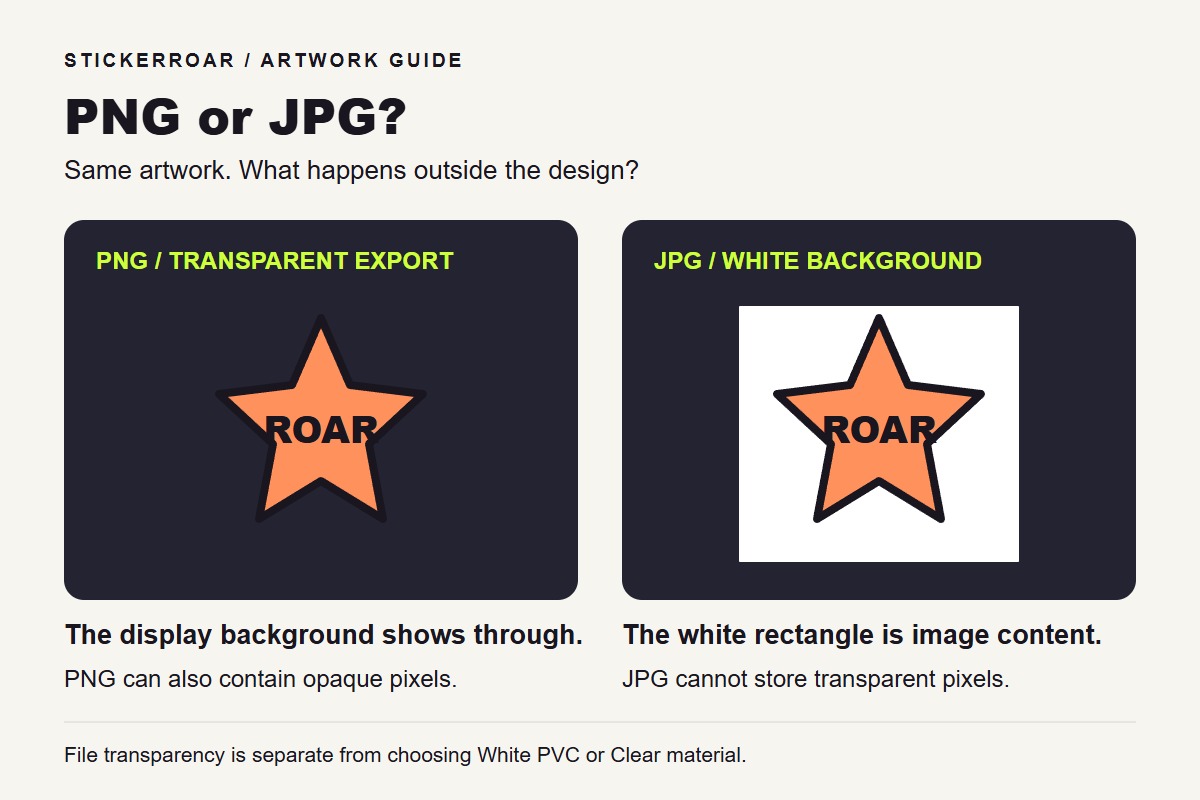
File-format diagram, not a print sample. View the full-size comparison.
Choose the format for the background you want
Use PNG when your sticker artwork needs transparent areas, or when you want to preserve crisp text and line art from the original export. JPG is a practical choice for a photo or full-background illustration when you want to keep that background. The StickerRoar uploader accepts PNG and JPEG files up to 12 MB.
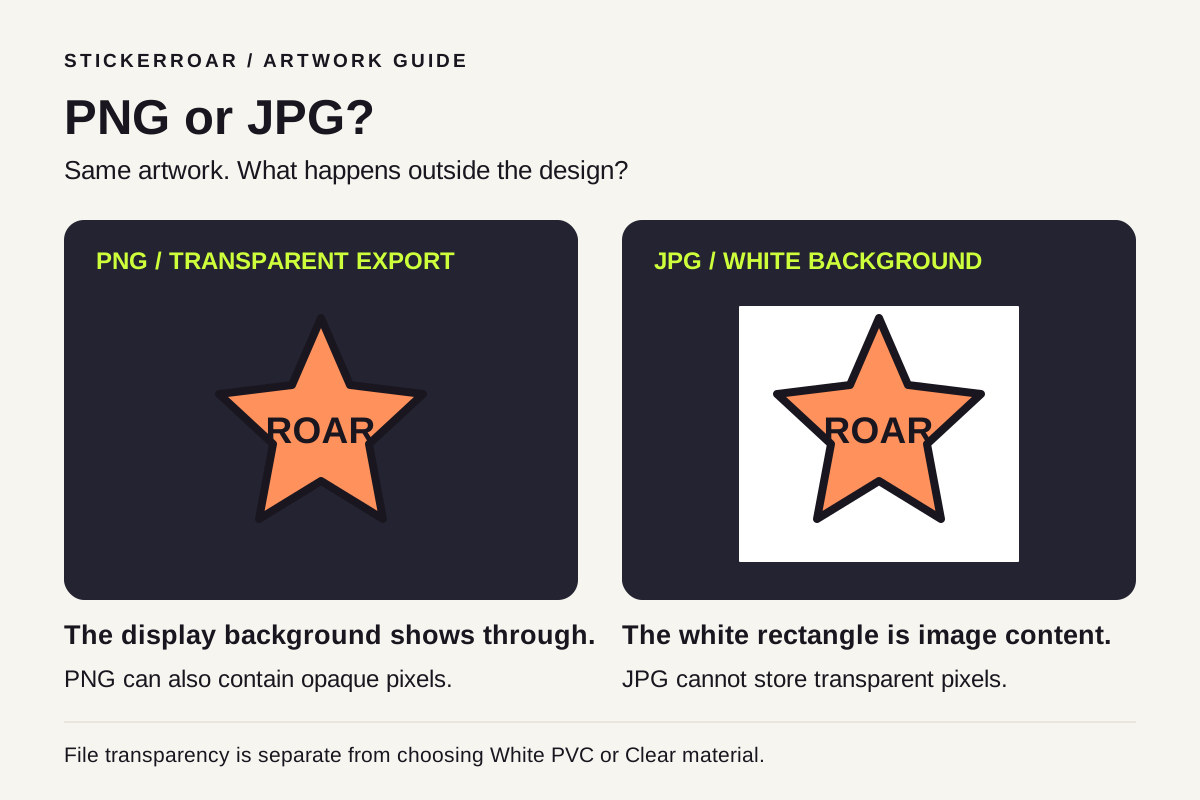
The diagram compares the same orange design against the same dark display background. On the left, the PNG's transparent area lets that background show through. On the right, the white rectangle is part of the JPG. This explains file transparency; it is not a preview of printed PVC or a material test.
When PNG is the better starting file
- A logo, character or drawing with no background: export PNG with transparency enabled. Merely choosing PNG does not remove existing white or colored pixels.
- Small lettering and sharp outlines: keep the original pixel dimensions and use a lossless PNG export where available. Enlarging a small image will not restore missing detail.
- Separate elements or gaps in the design: inspect both the outside edge and the spaces between elements after upload. Transparent pixels do not by themselves specify the final cut line.
If your design app displays a checkerboard behind the artwork, export the actual image rather than taking a screenshot. A screenshot can turn the checkerboard into visible image content. Open the exported file against two different background colors: transparent areas should reveal each background, while an exported checkerboard remains visible.
When JPG is a reasonable choice
Use a high-quality JPG when a photograph's sky, landscape or other background is intentionally part of the sticker. There is no need to remove a background you want to keep. A full-background design can also be PNG; JPG may produce a smaller file for photographic content.
Inspect fine lettering and high-contrast edges after exporting. JPEG compression can introduce visible artifacts, especially when compression is strong. If those edges look damaged, return to the original artwork and export again with less compression or as PNG. Converting an already damaged JPG to PNG will not recover the lost detail.
For a photo where you want only the subject, start with the best source image and inspect background removal in the editor. Check hair, narrow gaps and pale edges before accepting the outline. Do not assume every background will be removed cleanly.
Check the export before you request printing
- Open the exported file, not just the design-app project. Confirm the complete design is present with no editor controls, scene mockups or accidental checkerboard.
- Confirm it is a PNG or JPEG and within the 12 MB upload limit. Renaming the extension does not convert the file.
- In the preview, check background removal, small gaps, text and the border. Keep any background that is intentionally part of your design.
- Choose your intended dimensions and review the resolution notice. Use our car sticker measurement guide to check the available space.
- Choose the physical material separately. A transparent PNG can be printed on an opaque base; it does not automatically make the finished sticker transparent. Compare White PVC and Clear.
Upload your artwork and review the preview
Open the sticker editor to upload your file, inspect the outline and choose your print options. You can submit an order request without paying online; final artwork, delivery and production details require confirmation.
For the format properties behind this guide, see MDN's image format reference. For our printing workflow, see custom car stickers.